Monday, March 31, 2014

Eureka! Behold: The Simplified Formula!


It has come to the attention of The Pocky Campaign, that some of our fans might be allergic to the ingredients in our original gluten/allergy-free Pocky formula. We've gone the extra mile and created The Simplified Formula. It's easier to bake, but most important, it’s safe for those who have egg/apple/legume/yeast allergies; and sensitivities to xanthan gum and tapioca products.

[Drum Roll]...Presenting: The Simplified Formula!

Ingredients:
1/3 cup of brown rice flour
1/3 cup arrowroot starch flour
1/3 of Teff Flour

1 teaspoon of cream of tartar
1/2 teaspoon of baking soda

1/4 teaspoon of salt
3-4 Tablespoons of maple syrup or your favorite sweetener.
approx. 1/3-2/3 of a cup of water
2 Tablespoons grape-seed oil (plus 1/2 teaspoon for the baggie)
1 teaspoon rice vinegar

1 medium Ziploc bag  
optional: 1/2 cup of Enjoy Life Chocolate Chips or your favorite brand of allergy-free chocolate chips.

Directions: 

1:  In a large mixing bowl, mix the dry ingredients together.


2: Slowly begin to add water to the dry ingredients mixture, until reaching a final consistence that looks like a cross between hearty oatmeal and pancake batter; not to thick and not to thin. [Note: Using all 2/3 of water isn't always necessary. Teff Flour has wonderful binding properties. It's one of the few gluten-free flours that naturally thickens without the use of eggs and xanthan gum. We noticed that different brand works differently, so adjust the water accordingly.]

3: In a small bowl mix grape-seed oil and rice vinegar, and then add to mixture, and stir.
[Note: Rice Vinegar is great for those who suffer from IC, because of it's low acid content, it also make the Pocky extra crunchy.]

4: Add 3-4 Tablespoons of Maple Syrup to the mixture (or your favorite sweetener- ex. Agave, Brown Rice Syrup, Yacon] Feel free to taste the mixture and adjust for preferred flavor.
[Trouble shooting: If mixture is still watery, add a bit more Teff flour and mix together or add ground chia seeds, mix and refrigerate for 15 mins, and then stir again]

 5: Drizzle 1/2 teaspoon of oil into a medium Ziploc bag. Smooth the outside of the bag around to spread the oil around inside. (This prevents the dough from sticking to it.)

6: Scrap the dough into the bag. Snip one of the corners slightly. [For Regular sized Pocky, cut a small snip in the bag. For Large Pocky cut a large snip.] Squeeze the dough out the corner on to a piece of parchment paper. Squeeze you Pocky dough into long lengths and leave about 1 1/2 inches in between your Pocky sticks to allow a room for rising.

7: Preheat the oven to 375F.

8:Then place parchment paper on a baking sheet, and slide into the oven.

9: Bake for 10 – 20 minutes or until crispy.

10: When the Pocky are done, remove from oven let them cool.

Optional Chocolate Frosting:

1: Using a double boiler (a bowl over a pot of boiling water) or microwave; melt chocolate chips.
2: When chips are melted, take Pocky sticks and dip until their half-way covered.
3: Place chocolate covered Pocky on parchment paper. When your finished dipping place your Pocky in the fridge for about 10-15 mins; so that the chocolate will harden.

Support The Pocky Campaign!

Sunday, January 19, 2014

MYTH-BUSTED: Why your grandparents didn’t have food allergies…but you do- It's not true!

    On January 6, a post titled, Why your grandparents didn’t have food allergies…but you do via Butter Nutrition went viral. Gluten-Free pages across the internet wasted no time in re-posting this link. The post lists 7 reasons as to why our grandparents didn't have food allergies alluding that 21st century lifestyle is the cause. There's nothing like the good ol' days as this post congers an era of nostalgia among it's readers. Nostalgia has often be used as a tool to mislead the public, and there's no exception when it comes to this post. It is littered with several historical inaccuracies. It's time to shed some light on Butter Nutrition's list and let the facts speak from themselves.  

We'll be Myth-Busting this list in order of most to least inaccurate:

6) They didn’t go to the doctor when they felt sick or take prescription medications. Doctor visits were saved for accidental injuries and life threatening illness. When they got a fever, they waited it out. When they felt sick, they ate soups, broths and got lots of rest. They did not have their doctor or nurse on speed dial, and trusted the body’s natural healing process a whole lot more than we do today. Their food was medicine, whether they realized it or not.

Fact:  The 6th reason on that list is probably the worst one. Most of the medicines that we use today didn't exist back the early 20th century.

Of course people waited out a fever, because they had no choice! Tylenol (acetaminophen) and Advil (ibuprofen) commonly used to treat fevers and flu symptoms weren't invented until 1953 and 1969.  The only exception is aspirin, which has been around for centuries and first manufactured in the late 1800’s.  Unfortunately, aspirin isn’t safe for children.

Prescription medications, including over the counter (OTC) were very different the early 20th century. OTC medicine in the early 20th century, contained cocaine, alcohol and other dangerous substances which were often used to treat aliments such as: pain, PMS, and fevers. It was thanks to avocation of a chemist, Harvey Washington Wiley; that in June 1906, President Theodore Roosevelt signed into law the Food and Drug Act, also known as the "Wiley Act" to protect the public.  

The famous antibiotic known as penicillin was discovered in 1928, by Sir Alexander Fleming, yet it wasn't until 1945 that it was mass produced. 

Since this post is about food-allergies, epinephrine was discovered in 1901. It was one of the first hormones to be discovered. It was original used to treat asthma, cardiac issues (heart attacks, low blood pressure) [ref:  http://hardluckasthma.blogspot.com/2012/01/history-of-asthma-rescue-medicine.html]

Benadryl (diphenhydramine), the first generation of antihistamines to treat allergies was discovered in 1943 by George Rieveschl, and was approved by the FDA for prescription in 1946.
The lifesavingEpiPen, was invented by biomechanical engineer, Sheldon Kaplan. It was patented in 1977, and made public in 1980.

FYI- Anaphylaxis  is a life threatening, and it requires you to go to the hospital no matter what era your from.

5) They ate the whole animal that included mineral richbone broths and organ meats. Animal bones were saved or bought to make broths and soups, and organ meats always had a special place at the dinner table. These foods were valued for their medicinal properties, and never went to waste.

Fact: This statement seems to conveniently forget about Upton Sinclair's book, The Jungle, which exposed health hazards in the meat industry. Eating meat was unsafe, in fact human body parts were often found or mixed in- giving a whole new definition to the term finger food. The book caused uproar, in 1906 the Pure Food and Drug Act and the Meat Inspection Act.

4) They didn’t eat GMO’s, food additives, stabilizers and thickeners. Food was not yet treated with additives, antibiotics and hormones to help preserve shelf life and pad the pockets of food producers in the early 1900′s at the expense of the consumer’s health.

Fact: Okay, theirs is truth to this statement, but not in the historical sense. Yes, GMO’s food additives, stabilizers and thickeners aren’t good for you. Historical speaking the antibiotics/hormones that are given to animals weren’t invented in 1900, nor where modern additives, stabilizers or thickeners. High fructose corn syrup (HFCS) was first in the food industry in 1960. In the 1970’s it began to replace the primary sweetener sucrose (sugar from beets or cane) because it was cheaper.

Remember Wonder Bread, invented in 1921, it was the first packaged sliced bread, and it also retained its shape- thanks to preservatives. In 1940 vitamins and minerals to Wonder Bread as part of a government-sponsored program of enriching white bread which was notoriously deficient in vitamin and mineral content, to combat certain diseases, beriberi and pellagra. This leads us to our next point…..

1) They ate seasonal real food.Food came from farms and small markets in the early 1900′s, and because food preservatives were not widely used yet, food was fresh. Because of the lack of processed food, their diets were nutrient dense allowing them to get the nutrition they needed from their food. For babies, breast milk was valued and it was always in season.

Fact: This is false! There were several vitamin deficiency diseases back in the 1900’s, the most famous would be Pellagra, which is caused by a vitamin B3 deficiency (niacin).  In a nut-shell the disease mostly plagued the southern states of the US. Originally it was thought to be caused by a germ. Dr. Joseph Goldberger proved that it was caused by a vitamin deficiency, that a well-balanced diet was the cure. The average diet in 1900’s was rich in corn and meat. The food that we take for granted weren't widely available.

2) They didn’t diet, and play restrictive games with their body and metabolism. They ate food when food was available.Our grandparents did not fall victim to fad diets, food marketing, calorie counting, and other detrimental dieting habits that are popular today (in part because the marketing infrastructure didn’t exist yet). Because of this they had a healthy metabolism, and ate according to their body’s needs and cravings.

Fact: Sorry, but diets have existed throughout history, take a look at this article from CNN.
Here are few:
1820: Lord Byron popularizes the Vinegar and Water Diet, which entails drinking water mixed with apple cider vinegar.
1903: President William Howard Taft pledges to slim down after getting stuck in the White House bathtub.
1925: The Lucky Strike cigarette brand launches the "Reach for a Lucky instead of a sweet" campaign, capitalizing on nicotine's appetite-suppressing superpowers.

3) They cooked food at home, using traditional preparation methods from scratch.Buying processed food was not an option, and eating out was a rare luxury. Lucky for our grandparents these habits actually increased their health.

Fact: This statement in confusing, it’s hard to tell whether it references to 1900’s version of home cooked meal or the 1950’s. It’s also an unfair statement, to make a meal from scratch in 1900 was a lot of work. Our grandparent would probably tell us that we are lucky. Inventions such as canned, frozen foods, and even refrigeration have been made life better. Try and imagine life without them?  

Frozen foods invented by in 1929 by Clarence Birdseye, gave people the opportunity have fruits and veggies when they weren’t in season. Today, Frozen Foods not only make cooking a meal easier, they’re considered a health alternative to their fresh counterparts, because they contain more fiber.

Also, cast-iron cook pans commonly used in the 1900’s, while they do add extra iron to food, there not ideal for people with food allergies; because allergens can stick to the pan.

7) They spent lots of time outside.Our grandparents didn’t have the choice to stay inside and play on their phones, computers and gaming systems. They played on the original play-station:  bikes, swing-sets and good ol’ mother nature!

Fact: Yes, the great outdoors is good for you. The many benefits include exercise, and vitamin D from sunshine. In regard to developing allergies this is a half-truth. There are studies that suggest that exposing children to outdoor activity at a very early age can help their immune system and prevent seasonal allergies. There was even an article in the NY Times stating that children who grew up on farm are less likely to develop food/seasonal allergies. That because we aren't exposed to pollen or harmless microbes, this cause our immune system to become hyper-sensitive resulting in allergies. 

What about genetics? If 1 parent has allergies your child has a 70% chance of developing a food/seasonally allergies. Children can out-grow their allergies, but a person who’s never had an allergy can also develop them in adulthood.
Some people develop seasonal allergies when they move. For example, if you grew up in North Africa, and then moved to France, you can develop seasonal allergies, because your immune system will not recognize the regional tree pollen.

Latex allergies can develop if you’re constantly exposed to the substance; this is common among medical personnel and people who work in rubber factories.

Personally, my mom cooked from scratch, I spent lots of time outdoors; even went to farm on weekends as a kids. I inherited the seasonal allergies from my mom along with her latex allergy. Within the past 5 year I have developed 18 food allergies.

The reality is allergies are complicated, and there are no easy answers.

 As far as this post is concerned, You've just been BUSTED!

Thursday, June 27, 2013

Gluten & Allergy-Free Expo- Here We Come!


It's a momentous occasion in Good Stuff history; we've been invited to be a part of the official blogger team for Gluten & Allergy-Free Expo (GFAF). We're honored that our humble blog will be covering this amazing event.

The Gluten and Allergen-Free Expo is the premier gluten and allergen free event in the United States. The GFAF Expo serves over 20,000 people with celiac disease, gluten sensitivities, auto-immune/anti-inflammatory diseases and autism as well as athletes and the health conscious community each year.

Over 100 large companies and small business vendors join together at each Expo. Attendees are able to sample products, purchase hard to find goods and attend over 20 informational sessions including Gluten-Free 101, Lifestyle and Cooking/Baking classes.

We'll be covering the GFAF Expo on September 7-8. Hold on to your hats, this is going to be Epic!

 
For more info click here

Monday, May 27, 2013

Super Easy Gluten-Free Spicy Pickles


    It's Memorial Day, and nothing is more American than the all mighty Pickle. Whether you place them on burgers or snack em...there just darn good! While were big fans of McClures Pickles - One of the the few brands that is Gluten-Free by using Apple Cider Vinegar, instead of traditional distilled vinegar (which can be made from corn or wheat). We developed this recipe that's not only easy to prepare, but its also easy on your wallet.
Now that's something worth celebrating ^.^


Ingredients: 

1- 16-20 oz jar

2-3 medium Kirby cucumbers

1 gloves of garlic

1 stick of dill

2/3 of a cup of apple cider vinegar

1/2 of a cup of water

2 TBSP's of salt

Spices:

a dash chile flakes

4 dashes mustard seed powder

1/8 tsp of caraway seeds

3 dashes of coriander

Directions: 


1) Wash and chop Kirby cucumbers , garlic and dill. The pack them in a clean glass jar (approx.16 -20 oz)

2) In a small pot add apple cider vinegar, water and salt and heat on medium heat.

3) When the salt is dissolved add the spices, and let it boil.

4) Turn off the stove and remove pot from heat; then carefully pour the hot liquid into the jar until it reaches the top.

5) The seal the jar and let it stand for 5-10 mins.

6) Place the jar in the fridge

[Pickling process take 3 days - 1 week]

Looking for a Non-spicy version? Then omit the spices, and this recipe turns into great dill pickles.

Happy Memorial Day!

Friday, March 15, 2013

The Flying Purple Cake

  
      The inspiration for this cake came from the Japanese concept of using beans to create sweet treats. There are added health benefits to this desert. It's well known that black beans contain C3G (cyanidin 3-glucoside) which enhances the body's metabolism to help burn fat. In general, beans are also been known to reduce blood sugar.The blueberries and strawberries help with thyroid and contain omega-3's. Teff Flour is a protein power-house. The best part is this cake is delicious. So, go head have your cake and eat it too ^.^


Ingredients:
2 - 16 oz cans of (no-salt) black beans
1/2 cup of strawberries
1/4 cup of blueberries
1/3 cup of teff flour
1/4 cup of arrowroot starch
2 tsp of guar gum
3 TBSP of agave syrup
1/2 cup of Enjoy Life chocolate chips
1/2 tsp of baking soda
1/2 tsp cream of tartar
optional: 2 TSBP of unsweetened coco powder

Directions:

1) In a food processor blend the strawberries and blueberries


2) Open the 2 cans of black beans, place in a colander and rise well; then add to food processor and blend.


 3) Pour in a bowl, and then mix in the dry ingredients. Add the chocolate chips, agave syrup, and mix again. [If the batter is still watery add extra 1 tsp of guar gum]


4) Line baking pan or spring form pan with parchment paper (this will prevent the batter from sticking). Now, pour in batter and smooth out the top.

5) Preheat Oven to 350, and bake cake for 35 mins

6) Feel free to decorate with fruit, melted chocolate or whatever your heart desires.

source: http://www.doctoroz.com

[Baking Tip from our friends at Sweet Freedom Bakery: baking soda and cream of tartar is a great replacement for baking powder]

Thursday, March 14, 2013

3.14 Anko (Red Bean) Pie


Pi Day is annual celebration of the mathematical constant π (pi). It is officially observed on March 14, since 3.14 are the first three digits of the numerical value pi. Pi Day was first officially celebrated on a large scale in 1988 at the San Francisco Exploratorium. Since then, Pi Day has been celebrated by millions of students and math-lovers. The easiest way to celebrate is to eat pi-themed foods, of course, being Pie! This year we've made a special pie to commemorate this mathematical constant.

Ingredients:

Giberts Gourmet Goodies Sensational Cookie Dough

Anko(Red Bean) Paste
   - Red Beans
   - 1/2 cup of sugar
   - 1/2 cup of orange juice

Olive Oil- to coat the pie pan

Directions:


1) Prepare the Anko(Red Bean) Paste and set aside

[Refer to our Easy & Traditional Anko (Red Bean) Paste Recipe]

To reduce the sugar for Traditional Anko Paste, use 1/2 cup of sugar and add 1/2 cup of orange juice

2) Defrost Gilberts Gourmet Goodies Sensational Cookie Dough

3) Coat the pie pan with olive oil

4) Now, cut the dough and form a ball

5) Using rolling-pin flatten the dough ball, then place and conform to pan.


6) Poke the crust with holes, this will help with pre-heating

7) Pre-heat the oven to 350 degree F, and place the pie-crust in the oven for 15 mins.

8) When the pie-crust is semi-cooked remove from the oven

9) Place on a hard surface, cool for 1-2 mins, and then add Anko(Red Bean) filling.


10) Feel free to create your own crust, and place the Pie back in the oven and cook for around 15-20 mins.

Happy Pi-Day!

To learn more about Pi-Day click here: http://www.piday.org/

Monday, February 4, 2013

The Good Stuff heads to Gluten & Allergy-Free Expo (GFAF)!


It's a momentous occasion in Good Stuff history; we've been invited to be a part of the official blogger team for Gluten & Allergy-Free Expo (GFAF). We're honored that our humble blog will be covering this amazing event.

The Gluten and Allergen-Free Expo is the premier gluten and allergen free event in the United States. The GFAF Expo serves over 20,000 people with celiac disease, gluten sensitivities, auto-immune/anti-inflammatory diseases and autism as well as athletes and the health conscious community each year.

Over 100 large companies and small business vendors join together at each Expo. Attendees are able to sample products, purchase hard to find goods and attend over 20 informational sessions including Gluten-Free 101, Lifestyle and Cooking/Baking classes.

Our convention date is still to be decided; however no matter which city we go to, we know that the GFAF is going to be epic!

It's GFAF or BUST!


For more info click here

Sunday, February 3, 2013

Superbowl Special: Quick & Easy Sweet Chilli G-Free RC Pizza


It's February, you know what that means? It's time for the Superbowl! Every season homes through out the US scramble to create an epic game-time spread. This year we've created a recipe that's quick and easy, so you can spend less time cooking and more time watching the game. These RC Pizza's are a perfect edition to your Superbowl party, with their sweet and spicy flavors you'll wonder how could you ever live without them.

Quick & Easy Sweet Chilli G-Free RC (Rice Cracker) Pizza

Ingredients:

4 Lundberg Sweet Chilli Organic Rice Cakes
1/4 cup of your favorite cheese or non-dairy cheese
4 oz of tomato paste
1 tsp of garlic
2 tsp of basil
A dash of red pepper flakes
3-5 mushrooms sliced
A dash of oregano
Your favorite topping (we chose mushrooms ^.^)

Directions:

1) Rise, clean and chop mushrooms and set aside.

2) Layout 4 crackers on a cookie sheet or microwave safe plate.

3) Take 4 oz of tomato paste and mix spices in a microwave safe bowl.

4) Microwave the tomato paste for about 50 seconds.

5) Take the warm tomato paste and spread on the Rice Crackers

6) Sprinkle the Rice Crackers with your favorite cheese, top with mushrooms, and oregano.

7) Microwave : 1-2 mins
    Conventional Oven: 350 degrees for 15-20 mins or until the cheese melts.

Done!  Now, Grab a cold one, RC Pizza, and  go watch the game ~.^

Saturday, January 19, 2013

Gluten-Free Turmeric Pancakes


Today's recipe is inspired by my friend Scott and his fiance Jasmine. We've decided to put a new twist on the classic gluten-free pancake. Turmeric is a wonderful spice that has many health benefits, it can even fight the flu[1]. This recipe is spicy with the right amount of sweet. These aren't your ordinary pancakes ~.^

Ingredients:

Turmeric Pancakes:

4 tps of turmeric
3 tsp of ginger powder
a dash red pepper flakes
1/4 tsp of cayenne pepper
2 tsp of agave syrup
1/4 tsp of cinnamon
1/8 tsp of mace
4 sticks of cilantro- chopped
mushrooms (optional)
1/2 cup of Arrowhead Mills Gluten-Free All Purpose (baking mix)
1/2 of milk or rice milk

Cherry Syrup:

1/4 cup of frozen cherries
4 tsp of agave syrup

Directions:

Turmeric Pancakes:

1) Wash and chop cilantro and set aside.

2) In a bowl, take 1/2 a cup of flour + spices and mix together.

3) Slowly add milk or rice milk and begin to stir until the batter has a nice thick liquid constancy.

4) Add the agave syrup and cilantro and mix

5) Heat up the skillet and add your favorite oil.

6) When skillet is warm, take around 1 TBSP of turmeric pancake mix and place in skillet.

7) Fry both sides of the pancake until golden brown

Cherry Syrup:

1) Microwave frozen cherries until defrosted.

2) In a food processor add cherries and agave syrup, then blend.


Drizzle syrup on Turmeric Pancakes...Mmm,Mmm...Good ^.^

Dedicated to Scott & Jasmine 

[1] source: Dr.Oz's Cold and Flu Rescue Pack

Monday, December 31, 2012

Eureka! Behold: Super Green Gluten/Allergy-Free Pocky!


New Years is just around the corner and it's time for a fresh start. As part of our New Years Resolution we've created Gluten/Allergy Pocky that not only delicious, but it's actually good for you. 2013 is all about being healthy ~.^


[Drum-Roll]....Presenting:

Super Green Gluten/Allergy-Free Home-Made Pocky

Ingredients:


1 teaspoon yeast
1/2 cup warm water
3/4 teaspoon honey/agave nectar/sugar
1/2 cup brown rice flour
1/3 cup tapioca starch
1 teaspoon arrowroot starch
1 egg white
1/4 teaspoon of salt
1/4 cup of Peas
1/4 cup of Broccoli
5 Tablespoons of Green Puree
1/2 teaspoon xanthan gum
2 Tablespoons grape-seed oil (plus 1/2 teaspoon for the baggie)
1 teaspoon apple cider vinegar
1 medium Ziploc bag
1/4-1/2 cup of Enjoy Life chocolate chips


Directions:
  1. Heat water until medium hot. Add honey and yeast and mix together. Set aside, while you mix the remaining ingredients.
  2. In a medium mixing bowl, mix together all of the dry ingredients.
  3. Stir wet ingredients together (egg white, vinegar, oil,) then dry ingredients and mix. (This mixture will be a bit lumpy, this is OK. Just mix well, and get rid of as many lumps as possible) 
  4. Check the yeast mixture. If it has risen, then add this to the dry and mix together. 
  5. In a food processor, puree the peas and broccoli to create green puree.(remember to cook veggies before pureeing ^o^)
  6. Then, add the green puree, and mix well.


  7. Drizzle 1/2 teaspoon of oil into a medium Ziploc bag. Smooth the outside of the bag around to spread the oil around inside. (This prevents the dough from sticking to it.) 


  8. Scrap the dough into the bag. Snip one of the corners slightly. [For Regular sized Pocky, cut a small snip in the bag. For Large Pocky cut a large snip.] Squeeze the dough out the corner on to a piece of parchment paper. Squeeze you Pocky dough into long lengths and leave about 1 1/2 inches in between your Pocky sticks to allow a room for rising. In the spirit of New Years , we made a Pocky version of the NYC ball drop^.^


  9. Preheat the oven to 400F.
  10. Then place parchment paper on a baking sheet, and slide into the oven.
  11. Bake for 10 – 20 minutes or until golden.
  12. When the Pocky are done, let them cool. 
  13. Using a double boiler (a bowl over a pot of boiling water) or microwave; melt chocolate chips.
  14. When chips are melted, take Pocky sticks and dip until their half-way covered.
  15. Place chocolate covered Pocky on parchment paper.
  16. When your finished dipping place your Pocky in the fridge for about 10-15 mins; so that the chocolate will harden.  
           

Support The Pocky Campaign!

Sunday, November 25, 2012

Eureka! Behold: Poppin' Gluten/Allergy-Free Pumpkin Pocky!


For Thanksgiving, The Pocky Campaign has baked a very special holiday recipe. Our new flavor: Pumpkin Pocky, was inspired by America's favorite pie. This year we're giving a whole new meaning to carving up the turkey ~.^

[Drum-Roll]....Presenting:

Poppin' Gluten/Allergy-Free Home-Made Pumpkin Pocky

Ingredients:


1 teaspoon yeast
1/2 cup warm water
3/4 teaspoon honey/agave nectar/sugar
1/2 cup white rice flour
1/3 cup tapioca starch
1 teaspoon arrowroot starch
1 egg white
1/4 teaspoon of salt
5 Tablespoons of Pumpkin Puree
1 teaspoon of cinnamon 
1/2 teaspoon of nutmeg
1 teaspoon of honey or sugar
1/2 teaspoon xantham gum
2 Tablespoons grape-seed oil (plus 1/2 teaspoon for the baggie)
1 teaspoon apple cider vinegar
1 medium Ziploc bag
1/4-1/2 cup of Enjoy Life chocolate chips

Directions:
  1. Heat water until medium hot. Add honey and yeast and mix together. Set aside, while you mix the remaining ingredients.
  2. In a medium mixing bowl, mix together all of the dry ingredients.
  3. Stir wet ingredients together (egg white, vinegar, oil,) then dry ingredients and mix. (This mixture will be a bit lumpy, this is OK. Just mix well, and get rid of as many lumps as possible) 
  4. Check the yeast mixture. If it has risen, then add this to the dry and mix together.


  5. Then, add the pumpkin puree, cinnamon, nutmeg and honey and mix well.
  6. Drizzle 1/2 teaspoon of oil into a medium Ziploc bag. Smooth the outside of the bag around to spread the oil around inside. (This prevents the dough from sticking to it.)


  7. Scrap the dough into the bag. Snip one of the corners slightly. [ For Regular sized Pocky, cut a small snip in the bag. For Large Pocky cut a large snip.] Squeeze the dough out the corner on to a piece of parchment paper. Squeeze you Pocky dough into long lengths and leave about 1 1/2 inches in between your Pocky sticks to allow a room for rising. In the spirit of the holidays, we made a Turkey ^.^


  8. Preheat the oven to 400F.
  9. Then place parchment paper on a baking sheet, and slide into the oven.
  10. Bake for 10 – 20 minutes or until golden.
  11. When the Pocky are done, let them cool.


  12. Using a double boiler (a bowl over a pot of boiling water) or microwave; melt chocolate chips.
  13. When chips are melted, take Pocky sticks and dip until their half-way covered.
  14. Place chocolate covered Pocky on parchment paper.
  15. When your finished dipping place your Pocky in the fridge for about 10-15 mins; so that the chocolate will harden.

There you have it: Home-made Gluten/Allergy-Free Pumpkin Pocky!

Happy Thanksgiving ^.^


Support The Pocky Campaign!

Friday, November 23, 2012

Thanksgiving Special: Spicy Pumpkin Pie


It's America's favorite Thanksgiving dessert: Pumpkin Pie. No matter how you slice it, it's always delicious. This year we've decided to kick things up a notch, by adding some southwestern flavor. Our pumpkin pie will take you south of the border; it's the right blend of spicy and savory sweet. To make things interesting, this years recipe is also dairy/egg-free.

Ingredients:
1 can of pumpkin puree (15 oz)
3/4 of flaxseed milk (original flavored)
1/2 of a jalpaneo pepper
a pinch of lime juice
1/2 of a banana 
2 tsp of cinnamon 
3/4 tsp of nutmeg
1/4 tsp of mace
a dash of cloves
6 TBSP of honey
a small slice of ginger
1 tsp of orange flower water
3 tsp of guar gum

+ Your favorite  allergy-friendly pie crust recipe

Directions:

1) Wash and chop jalpaneo pepper and set aside.

2) Using a blender or food processor add all ingredients, except the guar gum. Then blend together.

3) Pour the pumpkin mixture into a bowl, or cuisine art.

4) Then add the guar gum, and mix using a hand mixer or cuisine art, until it looks similar to pudding.

5) Slowly add the pumpkin filling into your favorite allergy-friendly pie crust.

6) Bake at 350 F for 25-30 mins.

7) Let the pie cool & cut and serve.

Happy Thanksgiving ^.^

This recipe is dedicated to my brother


Sunday, July 1, 2012

Happy Anniversary to The Pocky Campaign!


In July 2011, The Pocky Campaign was formed. What started as a humble petition to manufacturer, Ezaki Glico to create Gluten/Allergy-Free Pocky has grown into a movement. The campaign has created several Gluten/Allergy-Free versions of this favorite treat, and there's still more to come. To celebrate their 1 Year Anniversary; they've baked special edition Gluten/Allergy-Free Pocky!


Presenting...[Drum Roll].... Gluten/Allergy-Free Pocky Cupcakes ^.^

Happy 1 Year Anniversary!

Monday, June 25, 2012

The Good Stuff Spotlight: Mexican Coca-Cola!


In the US, Coca-Cola is made with HFCS( high-fructose corn syrup) and corn syrup. For those who have a Corn Allergy, we've had to give up drinking our iconic soda. It turns out Coca-Cola in Mexico is made the old fashioned way, with sugar. Folks, hold off on buying a plane ticket to Mexico!

The Good News: Mexican Coca-Cola is sold on the West-Coast!

The Taste Test:

It's exactly the same as US Coca-Cola.The only difference is it Corn-Free and it costs $0.99 a bottle. The only questions are: Why must Coca-Cola continue to discriminate it's US customers who have food allergies? Why can't there be one Coca-Cola, made the old fashioned way, with sugar instead of corn? It's time to end this discrimination now!

The Good Stuff Rating: 5/5

Want to make a difference? Join here


Thursday, June 21, 2012

The Good Stuff Cooking Tip: The Lemon Saver!


       Avocados are good for you and a healthy source of protein. There's one catch: Oxidization! After pealing one, they will start to turn brown with in a few hours. How can you prevent this? On the first segment of The Good Stuff Cooking Tips, we've devised a method that will not only slow down oxidation, but will add classy touch to your avocado dishes.

The Lemon Saver!

Ingredients:

- 2 Lemons

- Guacamole

-  A bowl 

Directions:

1) Wash the lemons

2) Slice then lemons in half

3) Cut medium thick lemon slices, make sure they're circular

4) Begin by lining the bottom of the bowl with the circular lemon slices.

5) Depending on the shape of the bowl, cut some of the lemon slices into half circles, and line the sides of the bowl.

6) Carefully fill the bowl with Guacamole.

7) Cover the Top of the Guacamole with the remaining slices.

8) Place in fridge to store.

Serving right away? Then save the top slices for afterwards. 

Only eating 1/2 an avocado? Then slice 1/2 of a lemon. Put the lemon slices on top of the avocado your saving; wrap it in foil and store in the fridge.

Last, but not least our Super Easy Spicy Guacamole recipe.....


Super Easy Spicy Guacamole

Ingredients:

- 2 avocados

- 1/2 red onion

- 2 green onions

- your favorite chill pepper

- 1 medium sized tomato

- 1/8 of a cup of lemon juice

- 1 tsp of pepper

- 1/2 tsp of cumin

- 1 clove of garlic

- 2 tsp of red pepper flakes

Directions:

1) In a mixing bowl, cut and scoop out avocados, and mash into a paste.

2) Add lemon juice and mix

3) Wash red & green onions, tomato, chill pepper, garlic, and chop them.

4) Mix everything together

5) Add spices, and mix again.

Viola! Super Easy Spicy Guacamole ^.^


Wednesday, May 30, 2012

Fantastic Meat-Free Deli Slices


Last, but not least,  it's time to bring on Deli Slices. Finding Meat-Free Deli Slices which are allergy-friendly is very rare. The majority are made with soy or wheat gluten or both.  Our inspiration for Fantastic Meat-Free Deli Slices came from the Vegan Dad.  These Meat-Free Deli Slice are the first of their kind, they're Gluten/Allergy-Free- A major break through in allergy-friendly cuisine.

Presenting.....

Fantastic Meat-Free Deli Slices

INGREDIENTS
- 1 cup white beans
- 1/4 cup of red kidney beans
- 1 lemon
- 1/2 cup of water
- 1/4 cup grape-seed oil
- 2 tsp salt
- 2 tsp paprika
- 2 tsp onion powder
- 1 tsp garlic
- 1/4 tsp turmeric
- 1 tsp ground fennel
- 1 tsp sage
- 1 tsp pepper
- 1/2 tsp balsamic vinegar
- 1/2 tsp agave syrup
- 1/2 TBSP of xanthan gum
- 3/4 cup of brown rice flour
- 3/4 cup of teff flour

DIRECTIONS

1. After opening bean cans, place them in a strainer and rinse in water. Cut half a lemon and squirt on beans and rise.

2. Place beans, spices, oil, water, balsamic vinegar, and agave syrup in food processor and blend until smooth.


3. Pour in a bowl, and slowly add the flours and xanthan gum. Mix until firm, add more xanthan gum if necessary.

4. The cut and piece of foil and parchment paper. Lay foil on the bottom, and parchment on the top. Get the water steaming in your steamer.


 5. Take the "meat" dough and place it in the middle of the parchment paper.


 6. Shape into a log, then wrap like a tootsie roll. Try to make the roll as thick as possible.


7. Place in steamer, and steam for 1 hour.

8. In the last 15 mins of steaming, preheat oven to 350 degrees. Remove from steamer and bake for 45-60 mins. The "meat" is done when it swells and presses against the foil.

9. Cool in fridge for around 20-30 mins, then slice as needed for sandwiches...

Viola! Fantastic Meat-Free Deli Slices ^.^

Store in fridge, in an air-tight container.

Tuesday, May 29, 2012

Eurkea! Behold:Sensational Gluten/Allergy-Free Strawberry Pocky!


We've done it again! In 2011, The Pocky Campaign developed the recipe for Gluten/Allergy-Free Pocky. This memorial day, we have perfected the recipe for the second most popular Pocky flavor: Strawberry.

[Drum-Roll]....Presenting:

Sensational Gluten/Allergy-Free Strawberry Pocky

Ingredients:

1 teaspoon yeast
1/2 cup warm water
3/4 teaspoon honey/agave nectar/sugar
1/2 cup of brown/white rice flour combine
1/3 cup tapioca starch
1 teaspoon arrowroot starch
1 egg white
1/4 teaspoon of salt
1/2 teaspoon xanthan gum
2 Tablespoons grape-seed oil (plus 1/2 teaspoon for the baggie)
1 teaspoon apple cider vinegar or rice vinegar
1/4 cup of Strawberries
1/2 cup of soy-free white chocolate chips
1 medium Ziploc bag

 Directions:
  1. Heat water until medium hot. Add honey and yeast and mix together. Set aside, while you mix the remaining ingredients.
  2. In a medium mixing bowl, mix together all of the dry ingredients. 


  3. Stir wet ingredients together (egg white, vinegar, oil) then dry ingredients and mix. (This mixture will be a bit lumpy, this is OK. Just mix well, and get rid of as many lumps as possible)
  4. Check the yeast mixture. If it has risen, then add this to the dry and mix together.

  5. Drizzle 1/2 teaspoon of oil into a medium Ziploc bag. Smooth the outside of the bag around to spread the oil around inside. (This prevents the dough from sticking to it.)


  6.  Scrap the dough into the bag. Snip one of the corners slightly. [ For Regular sized Pocky, cut a small snip in the bag. For Large Pocky cut a large snip.] Squeeze the dough out the corner on to a piece of parchment paper. Squeeze you Pocky dough into long lengths and leave about 1 1/2 inches in between your Pocky sticks to allow a little room for rising.
  7. Set the Large Pocky aside to rise for 2-4 minutes.
  8. Preheat the oven to 425F.
  9. Then place parchment paper on a baking sheet, and slide into the oven.
  10. Bake for 9 – 15 minutes or until golden.
  11. When the Pocky are done, let them cool.

   12.  Chop the strawberries and place in a food processor, and puree.


   13.  Pour the puree into a bowl and set aside.


   14.  Using a double boiler (a bowl over a pot of boiling water)  melt the white chocolate.
   15. When the white chocolate is almost melted, add 3 TBSP's of strawberry puree and mix.


   16.  Voila! Strawberry-White Chocolate.
   17.  Remove bowl from double boiler. Take Pocky sticks and dip until their half-way covered, or use a knife to spread the Strawberry-White Chocolate.
   18.  Place Strawberry covered Pocky on parchment paper.
   19.  When finished dipping, place Pocky in the fridge for about 10-15 mins; so that the strawberry coating will harden.
   19. Note: This Pocky is best enjoyed within 1-5 days 

There you have it: Home-made Strawberry Gluten/Allergy-Free Pocky ^.^


Monday, May 28, 2012

The Super Meat-Free Hotdogs


  There's nothing more American than the mighty hot-dog; juicy, plump and delicious. For Memorial Day, we've developed a unique recipe. These veggie dog's are not only gluten-free, but free of: soy, corn, dairy and potatoes. The cooking process is the same as manufacturing regular hot-dogs, except on a smaller scale. They can be baked, fried, or just steamed; Ball Park has nothing on these hot-dogs ~.^

The Super Meat-Free Hotdogs

Ingredients:

1 16 oz can of pink beans
2 chopped sticks of celery
4 chopped mushrooms
1 Red Fresno chill pepper
1/4 of a red onion
1/2 lemon
1 clove of garlic
2 Tsp of paprika
1 tsp of mustard seed powder
1/4 tsp mace
1/4 tsp of red pepper flakes
1/4 Cayenne pepper
1/8 tsp of salt
dash of ginger root powder
1/4 of Quinoa
1/4 cup of brown rice flour
1/4 cup of white rice flour
1 TBSP of xanthan gum

1-2 tsp of olive oil ( for parchment paper)

Directions:

The "Meat" 

1) Cook 1/4 cup of Quinoa and set aside.

2) Clean/chop celery, mushrooms, red onion, garlic, and red fresno chill pepper and set aside.

3) Open the can of pink beans and rinse.

4) Place washed pink beans in a food processor, and squeeze 1/2 a lemon; then blend. 

5) Then add chopped celery, mushrooms, red onion, garlic, and Red Fresno chill pepper, Quinoa and blend until pureed.

6) Add spices, and then puree again.

7) In large bowl, add the bean puree and flour + xanthan gum mixture.

8) Mix until it's hard and sticky.

9) Place mixture in fridge for 1 hour.

"The Hotdogs"

1) Take parchment paper and cut into pieces.


2) Grease paper with olive oil.


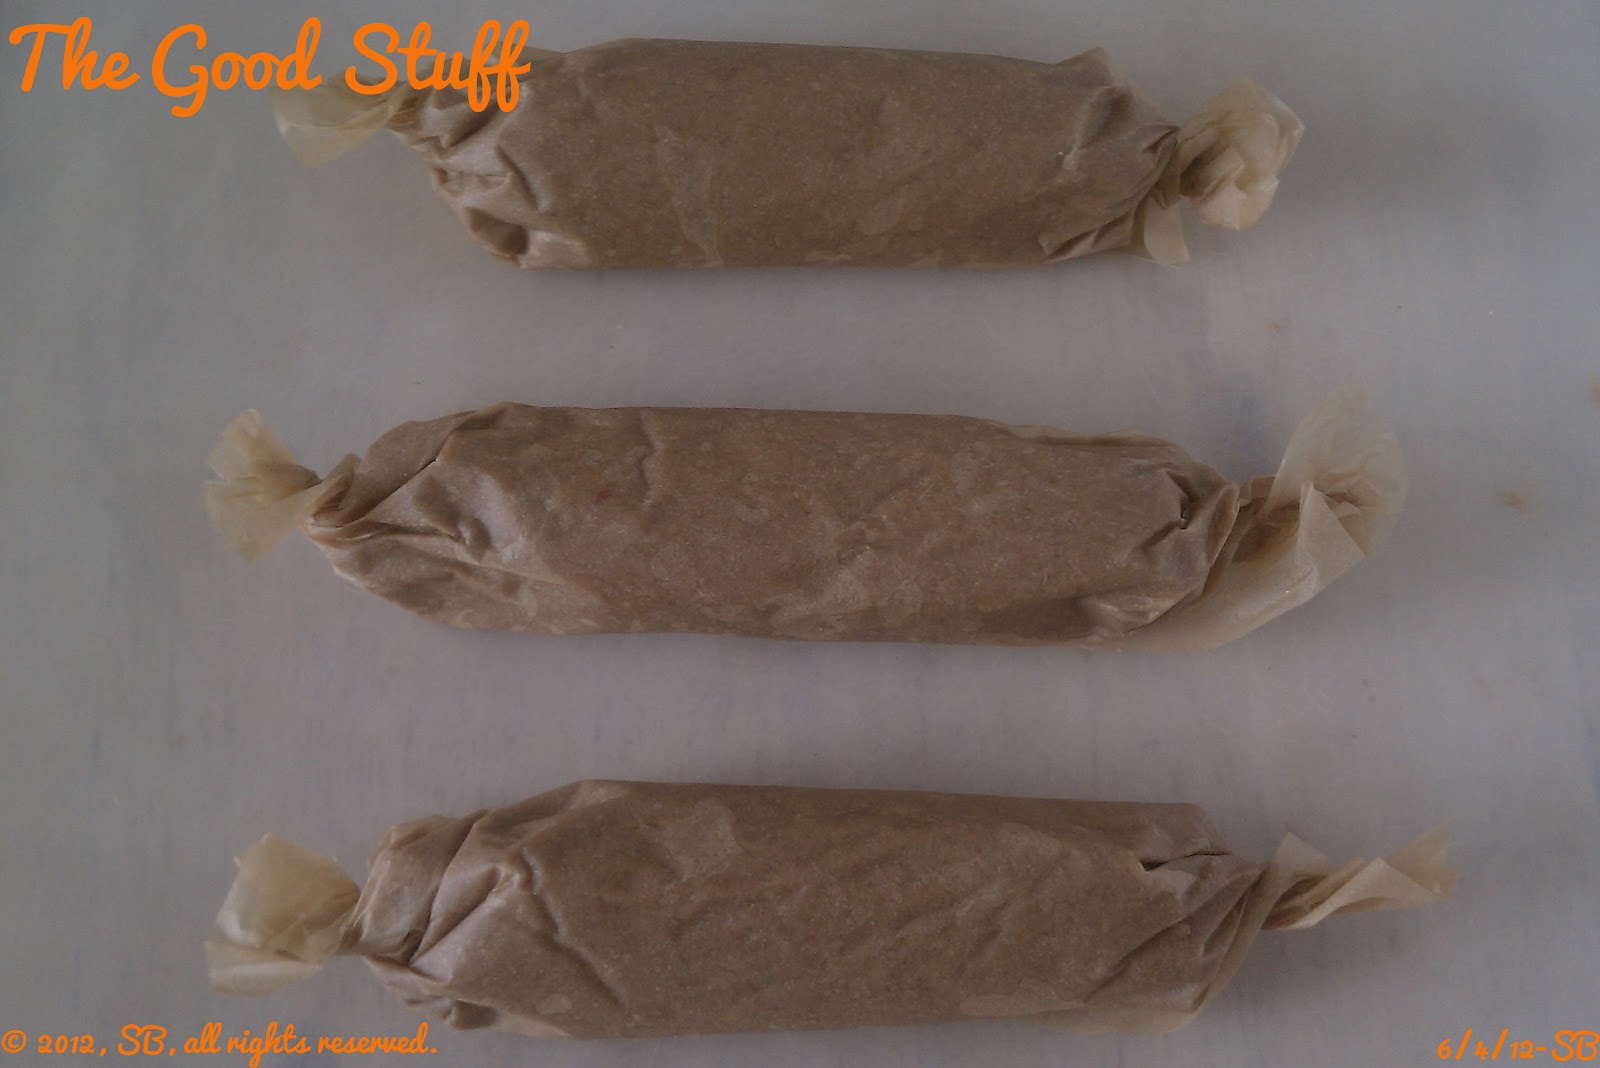
3) Take pieces of the mixture, place on parchment paper and shape into hotdogs.


4) Wrap hotdogs in parchment and twist the ends.


5)Then wrap with foil and twist the ends.


6) Place Hot-dogs in a steamer. Steam for 1 hour. Hot-dogs are ready when  plump and firm.

     Now, just like regular hot-dogs, these are ready to be baked, fried or frozen for future use.


Baking Time: 1 hour on 350F.


Note: Why did we wrap the hot-dogs in foil?

 Traditionally when hot-dogs are made, they're enclosed in casing made of small intestines of animals, or an artificial casing made of cellulose.(these are known as "skin-less" hot-dogs) Using the parchment and foil mimics the job of the casing, by giving our hot-dogs their shape.